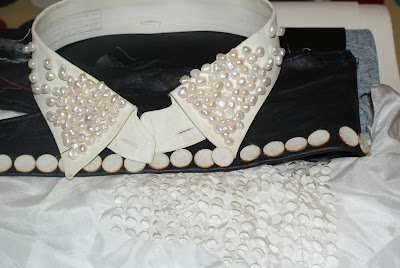
On Friday, I went through to Dundee to visit Sara for her textile workshop. I was looking forward to the day but, unfortunately, I had the cold all last week and wasn't as enthusiastic for getting immersed into the textile world as I would have hoped to have been! Fortunately, Sara was a lovely host and provided all manners of lunch and multiple cups of tea which are probably apparent in most of the photos! Illness aside, I was looking forward to the day as I have always had an interest in textiles in jewellery and have dipped a tiny toe into the ocean of different techniques before: a tiny bit of flocking, some terrible sewing, knitting when I was about 10 years old etc so I wasn't intimidated, just eager to learn.
Sara's workshop was divided into 2 sections: "Collars" & "Shibori"
Whereas I had tried to cram in a lot of different basic techniques into my day, I felt that the "Collars" part was a small introduction to textile techniques while "Shibori" was a more in depth lesson on one technique.
"Collars"
Drawing & Cutting Out!
First up was drawing our ideas for collars on paper folded in half for evenness; straight edged for a more traditional "man's shirt" style and rounded for contemporary peter-pan like design. Collars are ironically back in fashion at the moment and I actually had a peter pan style jumper on when visiting Sara so I thought it was a good modern idea for us to play around with.
I like that you can draw any shaped collar to allow for any type of adornment you wish. I decided to be quite playful and not think too much about any final pieces etc and just see where the outcomes would lead me. Sara had lots of paper so it was good to not be constrained.
A few paper collars pinned to the mannequin.
My favourite design.
Pinning the collars onto the mannequin allowed us to see how the collars would work on the body and I was instantly drawn to one of my collar designs as I realised it could be worn sideways and this would allow for some interesting customisation.
Paper collars laid out.
After deciding on designs, we had to pin the paper outline to our chosen materials. Again Sara had a good selection including buckram which is used to create the stiffness in collars which was made similarly to jute, which Dundee is famously known for, at Sara's workplace at a textile company. We used a lot of pleather as it was a nice soft, yet durable, material for me to work with.
We cut round the collar outlines, once pinned, leaving enough room for sewing later on.
Once we had our cut outs, we repeated the process on another material; we decided to make our collars out of 2 different types of materials for variation. Once we had to halves, we started to stitch round the outline with, what I believe was called, a "running stitch". Thinking I'd mastered it, I raced through a scalloped edged collar only to discover I'd effectively invented my own stitch which was completely wrong and was too spread apart to define the scalloped edge! The idea is that once you've stitched the 2 halves together, you leave a small un-stitched section that you can pull the collar through to turn it inside out, neatly sew up the hole, and have the seam hidden.
A decidedly un-scalloped, scalloped edged collar!
I eventually mastered the stitch - which was calming as it was repetitive - and went on to neatly sew the larger collar - only to realise we couldn't find a way to pull it inside out because I'd made an unbroken circle for the design! We decided to leave it at that as we were running out of time for the day and as I'd grasped all I was supposed to from that section and had had a good few learning curves for the day!
"Shibori"
Now Shibori was definitely my favourite activity of the day; easy to do - with instant results! Perfect!
Effectively "tie dye" of a sort, Shibori is created by either knotted material or tying string around sections of material then dyeing it to create pattern. For this, Sara had purchased some polystyrene balls for me to wrap in material before tying it with twine. I used the same material for both attempts but on one I just freely tied random sections or knotted the material for more experimental shapes and patterns. Usually Sara would create her own dyes, and did so for some experiments with her final year project with shibori, but we just used some Dylon dye for ease and time contraints. Below is the process:
Polystyrene balls tied up in the material.
Submerging the material in the dye - then allowing it to sit submerged for 30mins.
The material after it has been left submerged and rinsed of excess dye.
Untying the strings.
The finished product.
Repeating the process with the experimental knots.
Interesting shapes emerge.
All in all I enjoyed the textiles workshop and it's amazing how, once you learn a technique, you immediately think of alternative ways of using it. For me, Shibori was just so interesting thinking of potential patterns and how to create them and all the ways to introduce colour to pieces. The collars I can see being an integral part of a final piece or two as they are just so versatile and again, I like that they are something vintage that have been reintroduced as something modern in fashion at the moment.


