Showing posts with label Nicola Louise Reed. Show all posts

Tuesday, 19 February 2013

Final Idea 2


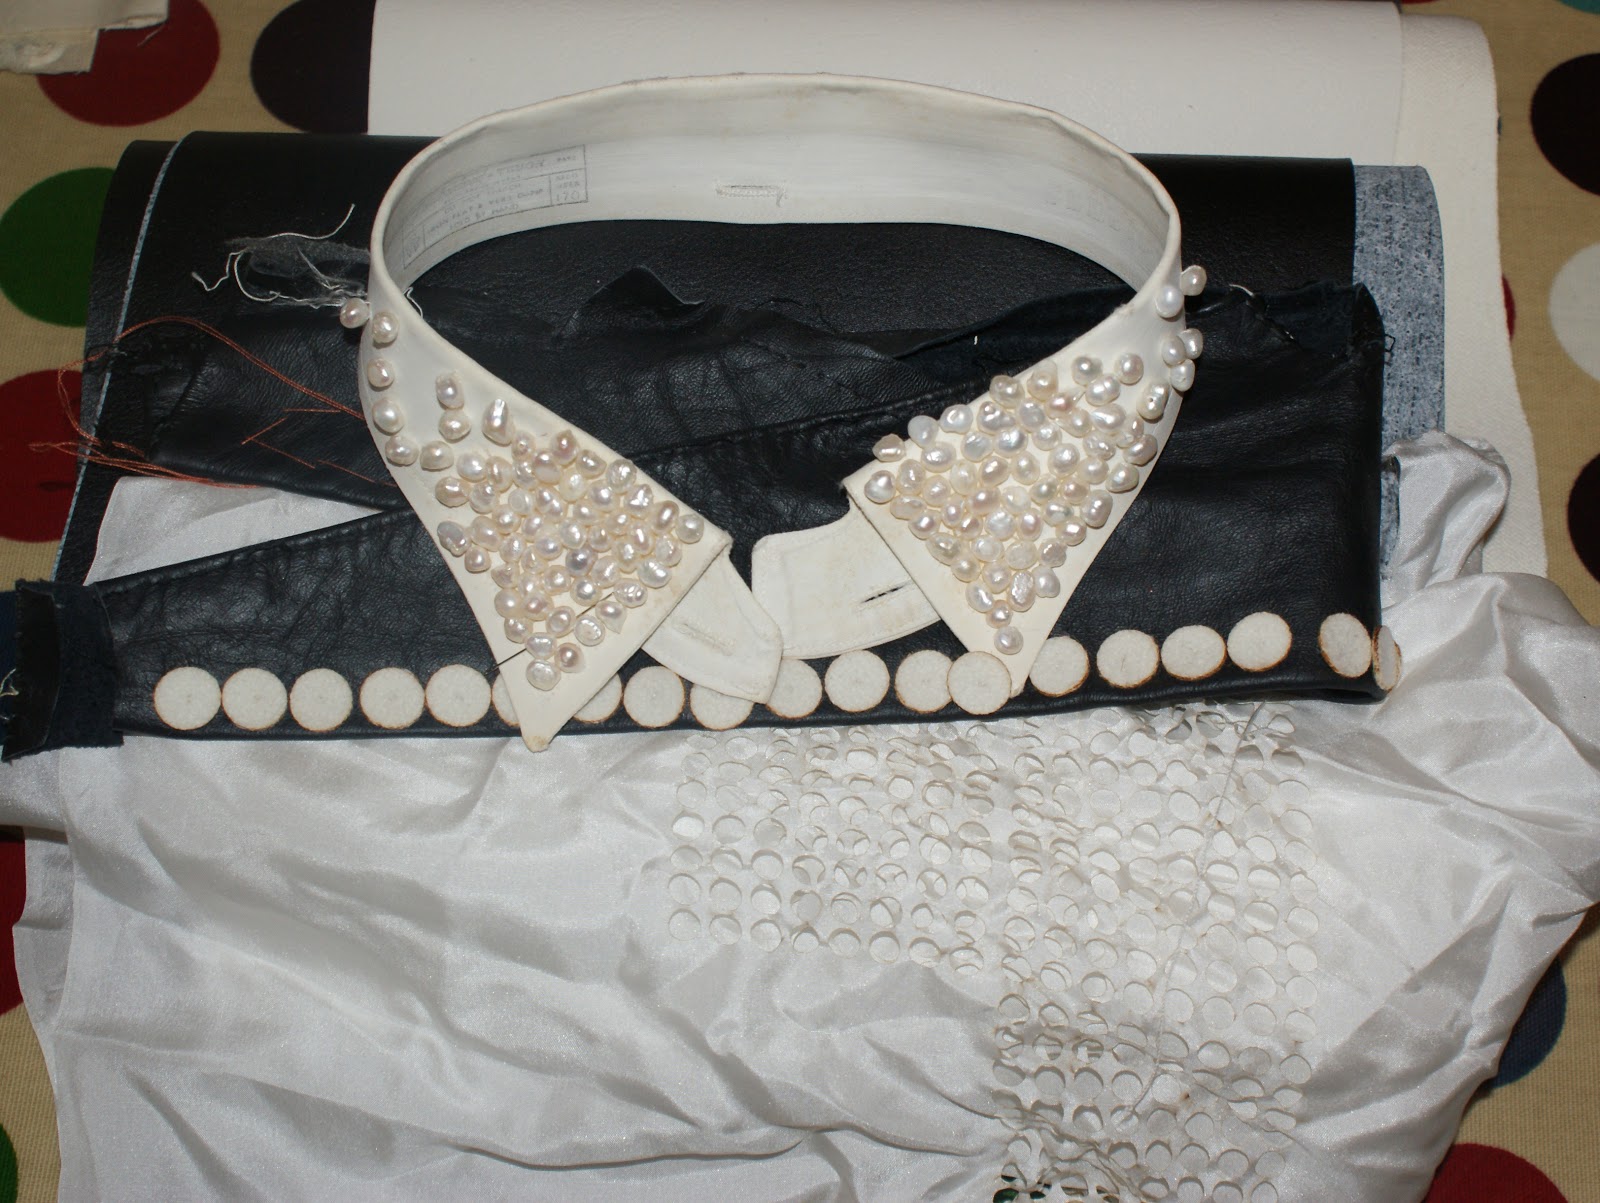
This piece is, again, a customised basic top featuring panels of light fabric. I will have to consult with Sara on which fabric would be best as I had pictured some sort of chiffon but I don't know if that would be too light to be branded without completely falling apart. Possibly it will have a mix of current top/vintage material or vice versa. I like the idea of this being a very floaty, feminine piece with very obvious burns/stains standing out. I wanted to do a graduated pattern mixing two techniques I've blogged previously; small rusted pin holes and then larger branded circles using pearl wire at the bottom. I chose these two techniques as I was particularly pleased with their results. Again, I will have to consult with Sara about how best to apply the panels to the top or if we would have to reconsider the shape of the panels.


A close up of the panels graduated pattern.

Thursday, 14 February 2013

Final Ideas Sketch


One of my final piece ideas which consists of a dark top of some description - whether vintage or contemporary is yet to be seen - which would feature collars or clusters of cross stitch loops pulling the fabric tight to highlight marks made with bleach. The patterns could run across the top of the item of clothing and be highlighted by the loops or the mark making could only be applied to the pulled fabric. I like the idea of attaching the cross stitch hoops using vintage or unusually coloured threads to pick up the variety of colours the bleaching will create. I'm not yet decided on the type of clothing yet as I'm hoping that we shall stumble across a beautiful unusual item that will be instantly recognisable as the right one to use - as seems to have happened previously with Re-worked. This design could be reversed in that the top could be light with the application of colour, but the idea of the bleach stripping the fabric as a destructive tool really appeals to the project.


Sunday, 10 February 2013

2 more...

via Pinterest

I actually tried doing some burn marks with irons in the early stages of Re-worked without much success as the iron has a safety setting so that it switches off if it gets too hot so my marks were very faint. It was suggested to use some old style irons (perhaps antique) heated up and again using this for branding. I love this image as it shows the variety of marks that can be made from the same type of object.


Another pin on Pinterest to catch my eye was this image (above) by a fellow blogger: Julia Weber

This is a container full of pennies which have been soaked in vinegar for a week which creates a lovely blue stain which this blogger has used for wood. I've been trying to include more colours in the mark making of Re-worked and I think this a lovely way of creating a marking element.


Sunday, 27 January 2013

Inspiration Spot


Leggings by Sianic Wear.


A final spot of inspiration - bleach on leggings. Love this use of mark making using "destructive" materials. Still working on final piece drawings which I hope to share soon for the project!

Friday, 2 November 2012

Textile Workshop


On Friday, I went through to Dundee to visit Sara for her textile workshop. I was looking forward to the day but, unfortunately, I had the cold all last week and wasn't as enthusiastic for getting immersed into the textile world as I would have hoped to have been! Fortunately, Sara was a lovely host and provided all manners of lunch and multiple cups of tea which are probably apparent in most of the photos! Illness aside, I was looking forward to the day as I have always had an interest in textiles in jewellery and have dipped a tiny toe into the ocean of different techniques before: a tiny bit of flocking, some terrible sewing, knitting when I was about 10 years old etc so I wasn't intimidated, just eager to learn.

Sara's workshop was divided into 2 sections: "Collars" & "Shibori"

Whereas I had tried to cram in a lot of different basic techniques into my day, I felt that the "Collars" part was a small introduction to textile techniques while "Shibori" was a more in depth lesson on one technique.

"Collars"


Drawing & Cutting Out!


First up was drawing our ideas for collars on paper folded in half for evenness; straight edged for a more traditional "man's shirt" style and rounded for contemporary peter-pan like design. Collars are ironically back in fashion at the moment and I actually had a peter pan style jumper on when visiting Sara so I thought it was a good modern idea for us to play around with.

I like that you can draw any shaped collar to allow for any type of adornment you wish. I decided to be quite playful and not think too much about any final pieces etc and just see where the outcomes would lead me. Sara had lots of paper so it was good to not be constrained. 


A few paper collars pinned to the mannequin.


My favourite design.

Pinning the collars onto the mannequin allowed us to see how the collars would work on the body and I was instantly drawn to one of my collar designs as I realised it could be worn sideways and this would allow for some interesting customisation.


Paper collars laid out.

After deciding on designs, we had to pin the paper outline to our chosen materials. Again Sara had a good selection including buckram which is used to create the stiffness in collars which was made similarly to jute, which Dundee is famously known for, at Sara's workplace at a textile company. We used a lot of pleather as it was a nice soft, yet durable, material for me to work with.


We cut round the collar outlines, once pinned, leaving enough room for sewing later on.


Once we had our cut outs, we repeated the process on another material; we decided to make our collars out of 2 different types of materials for variation. Once we had to halves, we started to stitch round the outline with, what I believe was called, a "running stitch". Thinking I'd mastered it, I raced through a scalloped edged collar only to discover I'd effectively invented my own stitch which was completely wrong and was too spread apart to define the scalloped edge! The idea is that once you've stitched the 2 halves together, you leave a small un-stitched section that you can pull the collar through to turn it inside out, neatly sew up the hole, and have the seam hidden.


A decidedly un-scalloped, scalloped edged collar!

I eventually mastered the stitch - which was calming as it was repetitive - and went on to neatly sew the larger collar - only to realise we couldn't find a way to pull it inside out because I'd made an unbroken circle for the design! We decided to leave it at that as we were running out of time for the day and as I'd grasped all I was supposed to from that section and had had a good few learning curves for the day!


"Shibori"

Now Shibori was definitely my favourite activity of the day; easy to do - with instant results! Perfect!

Effectively "tie dye" of a sort, Shibori is created by either knotted material or tying string around sections of material then dyeing it to create pattern. For this, Sara had purchased some polystyrene balls for me to wrap in material before tying it with twine. I used the same material for both attempts but on one I just freely tied random sections or knotted the material for more experimental shapes and patterns. Usually Sara would create her own dyes, and did so for some experiments with her final year project with shibori, but we just used some Dylon dye for ease and time contraints. Below is the process:


Polystyrene balls tied up in the material.


Submerging the material in the dye - then allowing it to sit submerged for 30mins.


The material after it has been left submerged and rinsed of excess dye.


Untying the strings.


The finished product.


Repeating the process with the experimental knots.


Interesting shapes emerge.


All in all I enjoyed the textiles workshop and it's amazing how, once you learn a technique, you immediately think of alternative ways of using it. For me, Shibori was just so interesting thinking of potential patterns and how to create them and all the ways to introduce colour to pieces. The collars I can see being an integral part of a final piece or two as they are just so versatile and again, I like that they are something vintage that have been reintroduced as something modern in fashion at the moment. 

Friday, 19 October 2012

Re-worked Skill Swap: Dundee

So today Nicola is visiting Dundee and it's my turn to show her a little tricks of my textiley trade. I had hoped, now being a Designer in Residence at DJCAD, that I might take her on a grand old tour of the dye lab, mix up some dyes and make some lovely prints in the studio BUT then I am reminded of the ethos of Re-worked; being spontaneous and reactionary to our materials. So, this considered, I have chosen to host my workshop for Nicola in my home.

Our workspace for the day (my kitchen table) with a range of fabrics etc.

I plan to work with Nicola on a dye technique called Shibori (often regarded as tie-dye but with more to it!) in emulation of some of our natural rusty dyes.

Some Shibori making materials - we will use the polystyrene and string as resist markers.

We will also construct a couple of collars (in a similar vein that is demonstrated by this A Common Thread blog post) mostly by way of hand stitching and perhaps a tad sewing machine as I would like to show Nicola a little pattern cutting and fabric construction. We will design our collar shapes together and pattern cut original shapes a la this. (Thanks Google!)

A vintage collar that Nicola sent me previous is inspiration for this route.

Nicola's workshop was such a wonderfully comprehensive one stop shop of a range of jewellery and metal work techniques that I found my own a rather difficult feat to plan but given the steps we are making towards creating our final pieces, I feel the dye, embellishment and construction techniques I will share with Nicola today are apt in helping us realise Re-worked project. 

Exciting! Can't wait for her to arrive! 

Tuesday, 21 August 2012

Necklace Design

I have produced some sketches and come up with a final design for a necklace for Sara to make, while I help & tutor her through the process. I designed a necklace that I felt had a look of Re-worked to it - similar colours and themes - and featured some small challenges for Sara along the way; some beading, soldering, oxidising and some branding. 

Below are some doodles and the final design (last picture). Despite designing it, I would love it if Sara had any input whether before making it, or whilst in the process of doing so, as I think it would be interesting to see if the materials bring out some creativity. I can't wait to see if Sara enjoys the task as jewellery making can require a lot of patience! We hope to arrange for Sara to come through soon to Aberdeen to get started!


Ideas for beading - Amber / Hematite?


Pendant sketches.


Tuesday, 24 July 2012

Workshop Schedule

I have been busy trying to make a list for a workshop "schedule" for Sara's day with me learning some metal work techniques. My list contained the following...

1. Saw piercing.
2. Soldering.
3. Filing & Cleaning.
4. Work with Findings.
5. Oxidising.
6. Beading.

When it occurred to me that most briefs I have followed have a physical outcome hence I have decided that to make the day more enjoyable, and rather than just follow some random tasks, I decided to set Sara the task of making a necklace. I think trying to make a piece will tie in nicely with the project as I feel Re-worked is based on acting on ideas quickly and seeing the results to then learn from them. I will produce a small rough sketch of a piece that would incorporate the above list and then talk Sara through the process of making it. I would be interested to see if Sara has any ideas to add to the design and would welcome them! I am really excited to see how Sara will find the day, especially as I often find jewellery making extremely frustrating and often lose my patience with it. Will it be as she expects?! I hope to hear her views both before and after! 

Sunday, 22 July 2012

Tea Stains

Here are the pictures of the results of the rose tea staining on the the stud clusters. As hoped there is a nice black rust ring round the clusters and also a nice layer of green on the studs themselves; from the coating of the metal I presume. 


Showing the black stains.


Close up of the clusters and the green coating that has appeared.


I am happy that more colours are being introduced into the work and would like to see more staining coming from the green coating - maybe some rubbings etc.

At the moment I am currently working on a plan for a workshop day with Sara, as we are just at the end of the experimenting stage. Re-worked has had to take a bit of a back seat, especially in the last few months as Sara is studying hard for her final Masters assessments, however we hope to get back on track quickly once it's ended. The works there - it's just not getting uploaded!! I hope to post the workshop plan this week with lots of basic workshop techniques!


Sunday, 3 June 2012

Missouri Bend Studio


I came across this work on Flickr via an image on Pinterest by Missouri end Studio after starting my experiment with some rose tea staining. "Embroidered Drawing on Teabag no.5": Hand stitching on teabag adhered to Japanese paper. Very inspiring.


Friday, 1 June 2012

Rose Tea


I noticed recently that the results from a previous experiment have either rusted or have produced salt crystals in unexpected places (the top handle) and I was inspired to see what results would be produced when experimenting with rust combined with other materials. Someone commented here that rusting with tea can produce a different colour so I decided to rust some previous clusters in tea (I chose rose tea as I had some loose leaves).


My hope is that, as the material the clusters are attached to is slightly plastic like, the tea will rinse off and the felt in the clusters will soak up the tea colour as well as the studs rusting with unusual colours so there will be more contrast in the experiment. 


The sample is currently drying off with some salt to speed up the process and possibly to create crystals. The results will be posted soon!

Thursday, 31 May 2012

Doodles

So I have been trying to get my head around this project again so have been doodling in prep for some final pieces. I'm not sure if I've posted any sketchbook for this project before but it actually differs from how I use sketchbooks for jewellery design: more flowing and expressive whereas I'm more technical with jewellery. 


Saturday, 14 April 2012

Bow: Affected.


The green staining of the bow reminds me of other natural states of disintegration and decomposition  - I think perhaps some other organic processes could be influenced and induced within our project work. More homework required!

Goodies from the Industrial Estates


In search of some inspiration as to where to go next for Re-worked, I had a dander around an industrial estate in Dundee. It was fruitful:


I have come away with a whole host of ideas in terms of form and texture - very much excited by the De-Icer spray can as I love the way it has crumpled and creased.